Onboarding
GenieBuilder includes a guided onboarding wizard that helps you get started quickly. The setup wizard launches automatically on first run and walks you through essential configuration steps.
Onboarding Demo
Watch this demo video to see the onboarding wizard in action:
Setup Wizard Flow
The onboarding experience consists of 6 steps:
Step 1: Welcome and Project Selection
The welcome screen introduces GenieBuilder and lets you select a project workspace.
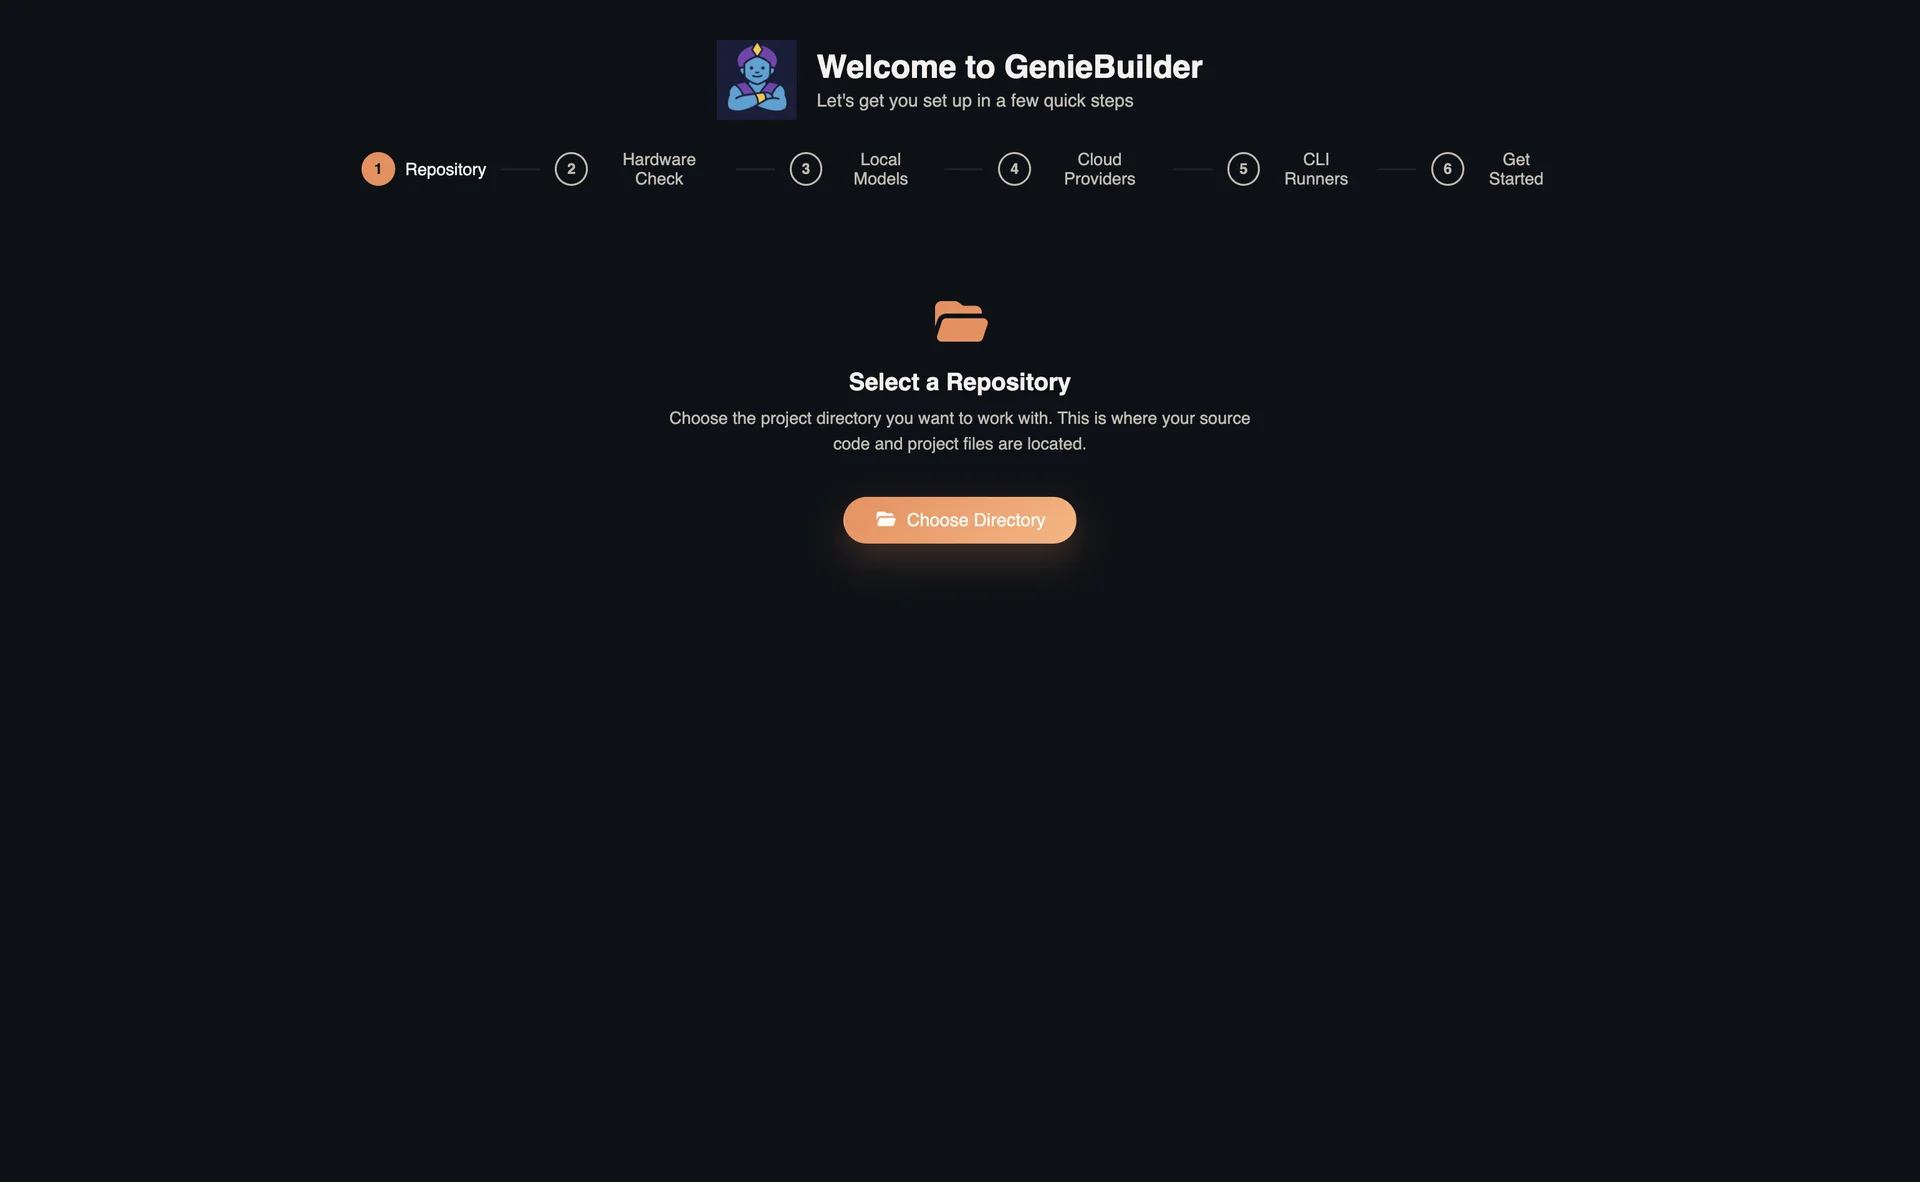
What you'll see:
- Overview of GenieBuilder features
- Introduction to the Agentic Workflow IDE
- Project selection options
Options:
- Open Project: Browse and select a local project folder
- Skip for now: Continue without a project (you can set this later in Settings)
Your action: Click Get Started to begin configuration.
Tip: Selecting a project now lets you immediately start exploring files and running agentic workflows.
Step 2: Hardware Check
The wizard checks your system capabilities for running local AI models.
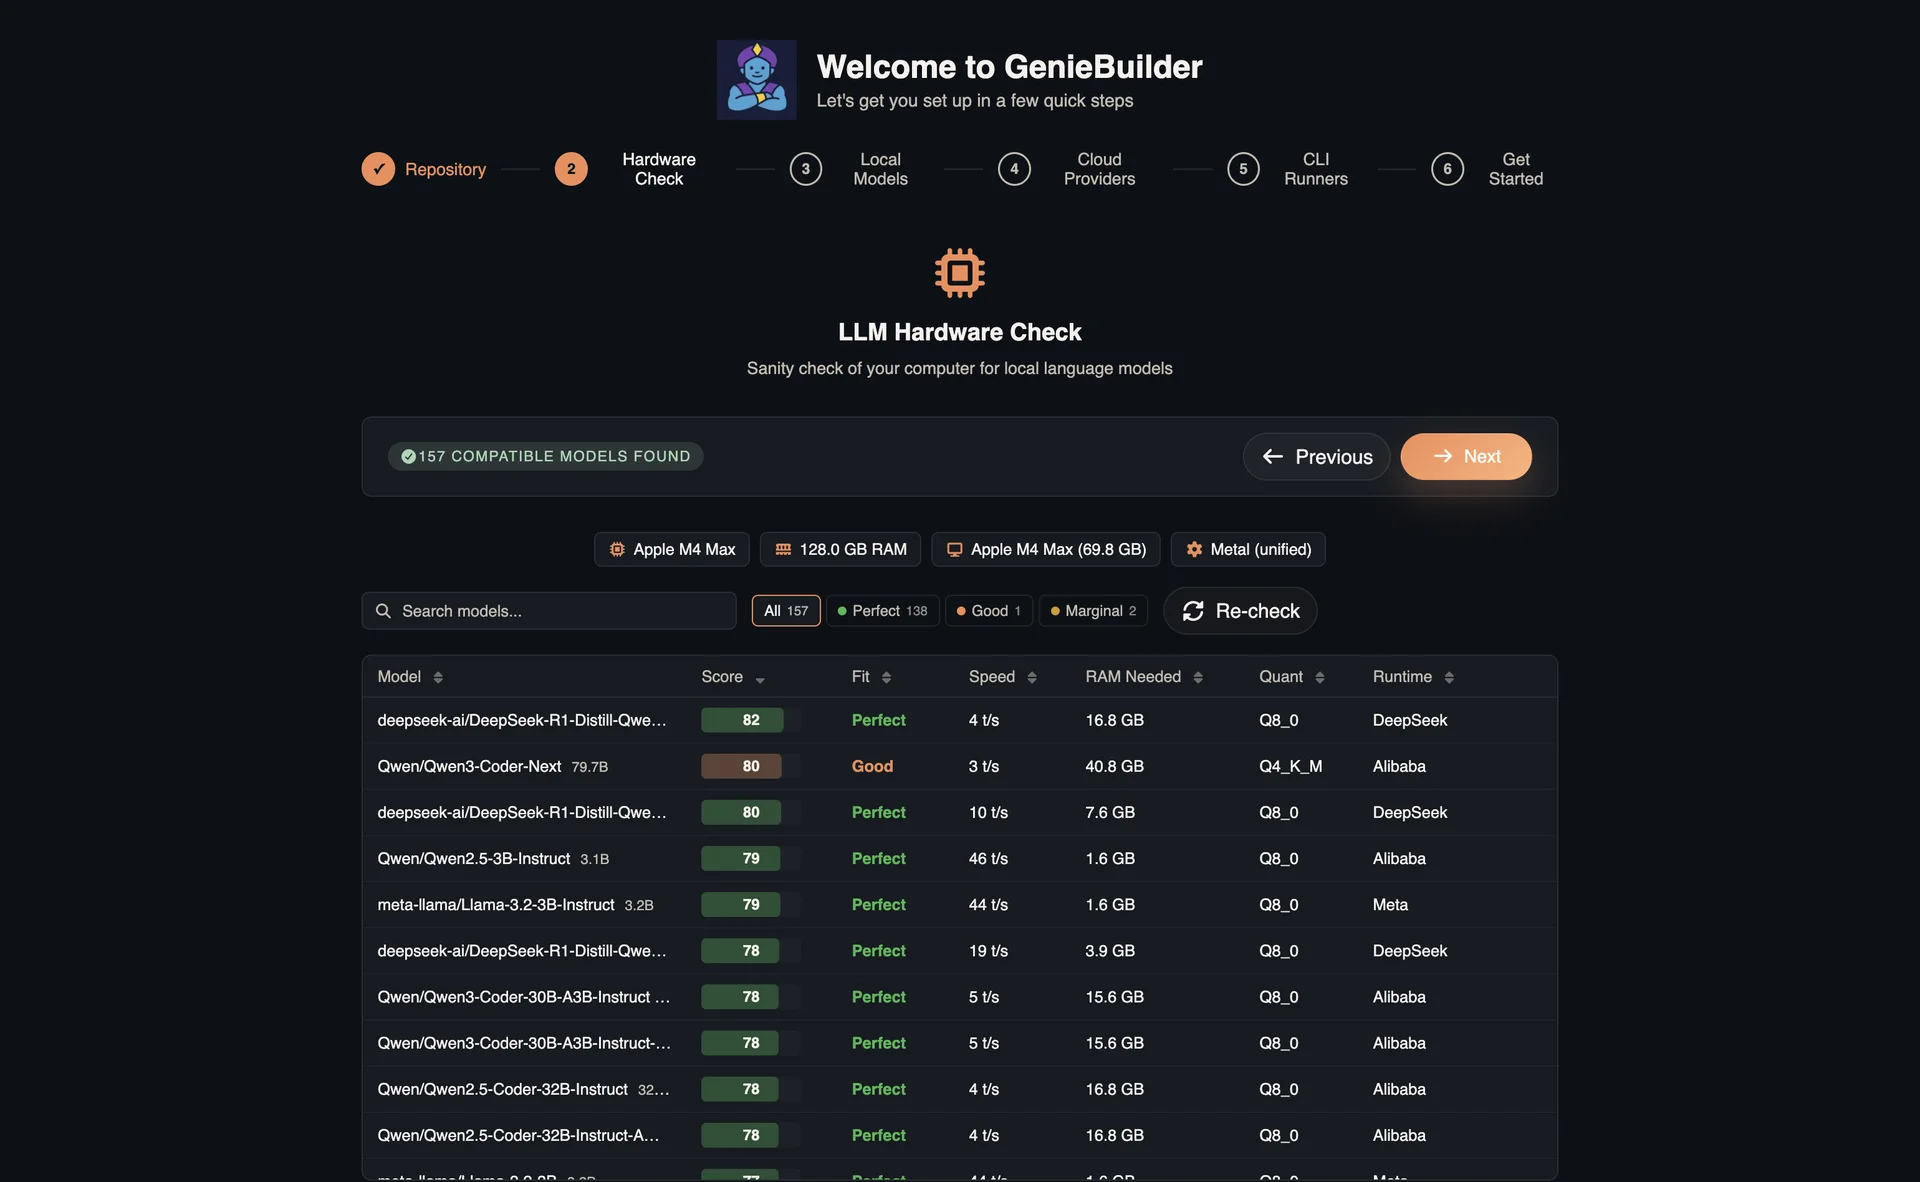
What's checked:
- Available memory (RAM) for model loading
- Graphics acceleration (GPU) availability
- Free disk space for model downloads
Results:
- Green indicators show capabilities that meet recommended thresholds
- Yellow indicators show areas that may limit performance
- You'll get recommendations for the best local AI model experience
Step 3: Local LLM Models
Configure local AI options for offline or privacy-focused usage.
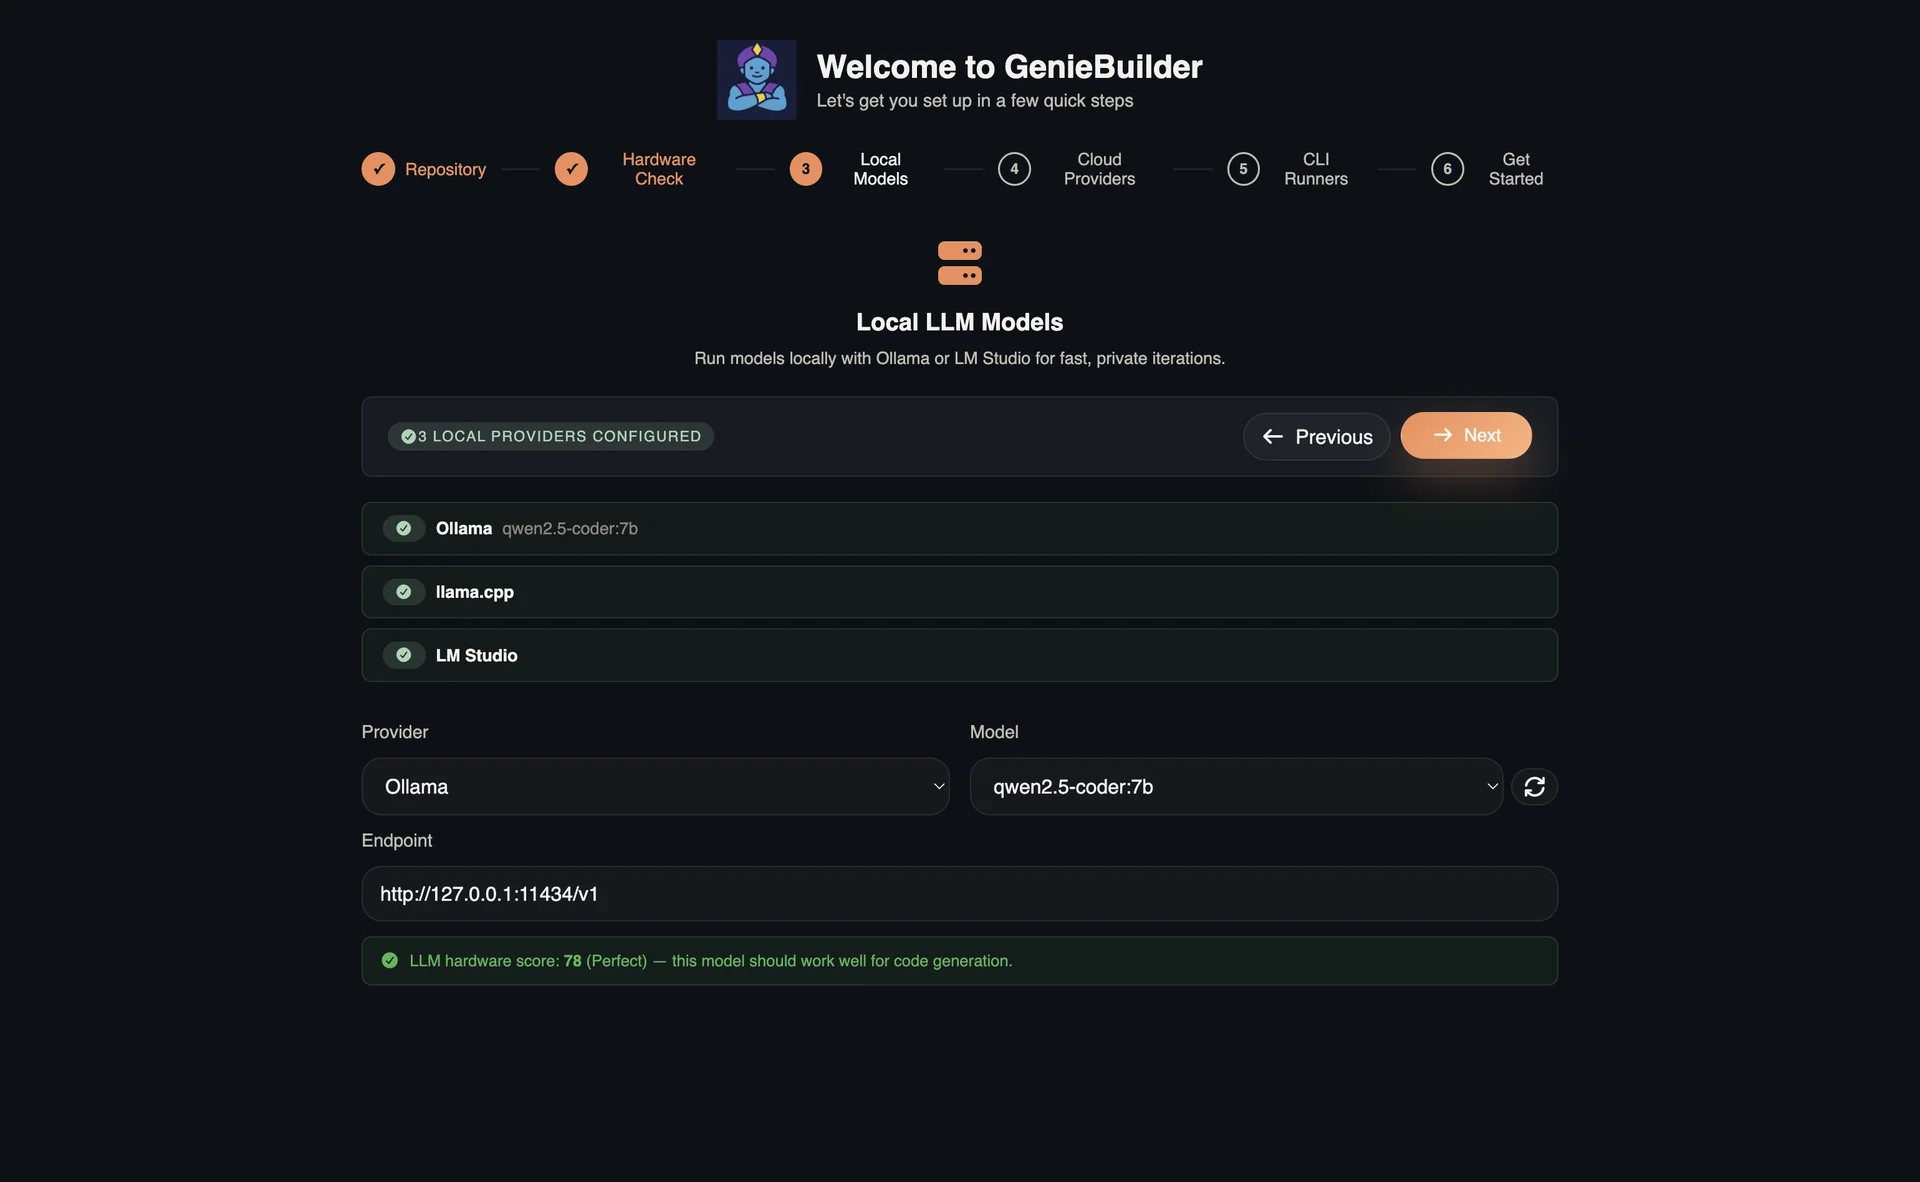
Local options:
- Ollama - Run AI models entirely on your computer (recommended)
- LM Studio - GUI-based local model management
- llama.cpp - Direct integration with custom builds
Setup:
- If you already have Ollama installed, GenieBuilder will detect it automatically
- If not, you can install it later and configure it in Settings
- Select which model to use from your locally available models
Benefits of local models:
- Complete privacy - your code stays on your machine
- Works offline without internet connection
- No API costs
Step 4: Cloud LLM Providers
Configure hosted AI providers for immediate use.
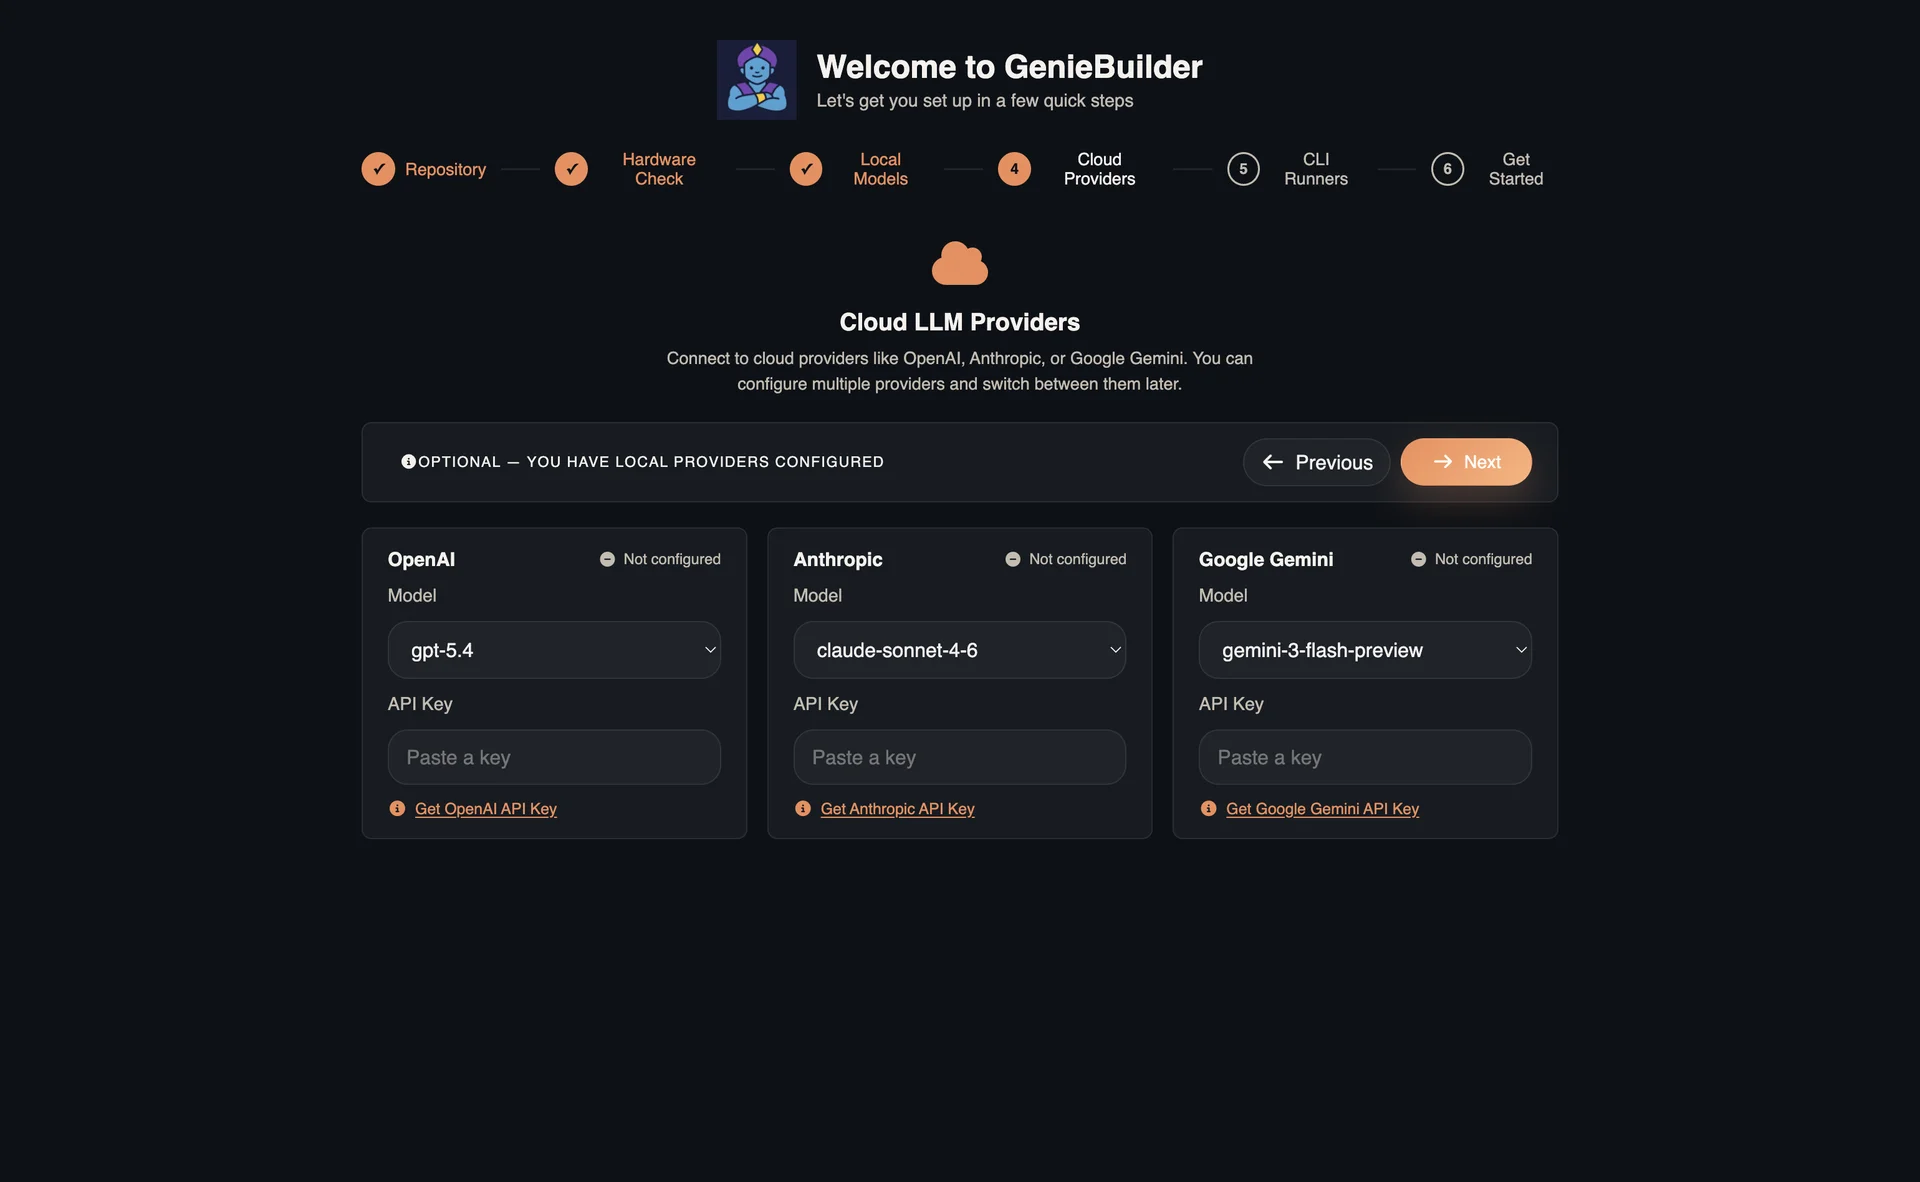
Supported providers:
- OpenAI - GPT-4 and other GPT models
- Anthropic - Claude models
- Google - Gemini models
What you need:
- An API key from your chosen provider(s)
- API keys are stored locally using Electron
safeStoragewhen available, with a plain-text fallback if secure encryption is unavailable
Tip: You can skip this step and configure cloud providers later in Settings. You only need at least one provider (cloud or local) to start using GenieBuilder.
Step 5: CLI Runners
Configure CLI-based AI agents for specialized agentic workflows.
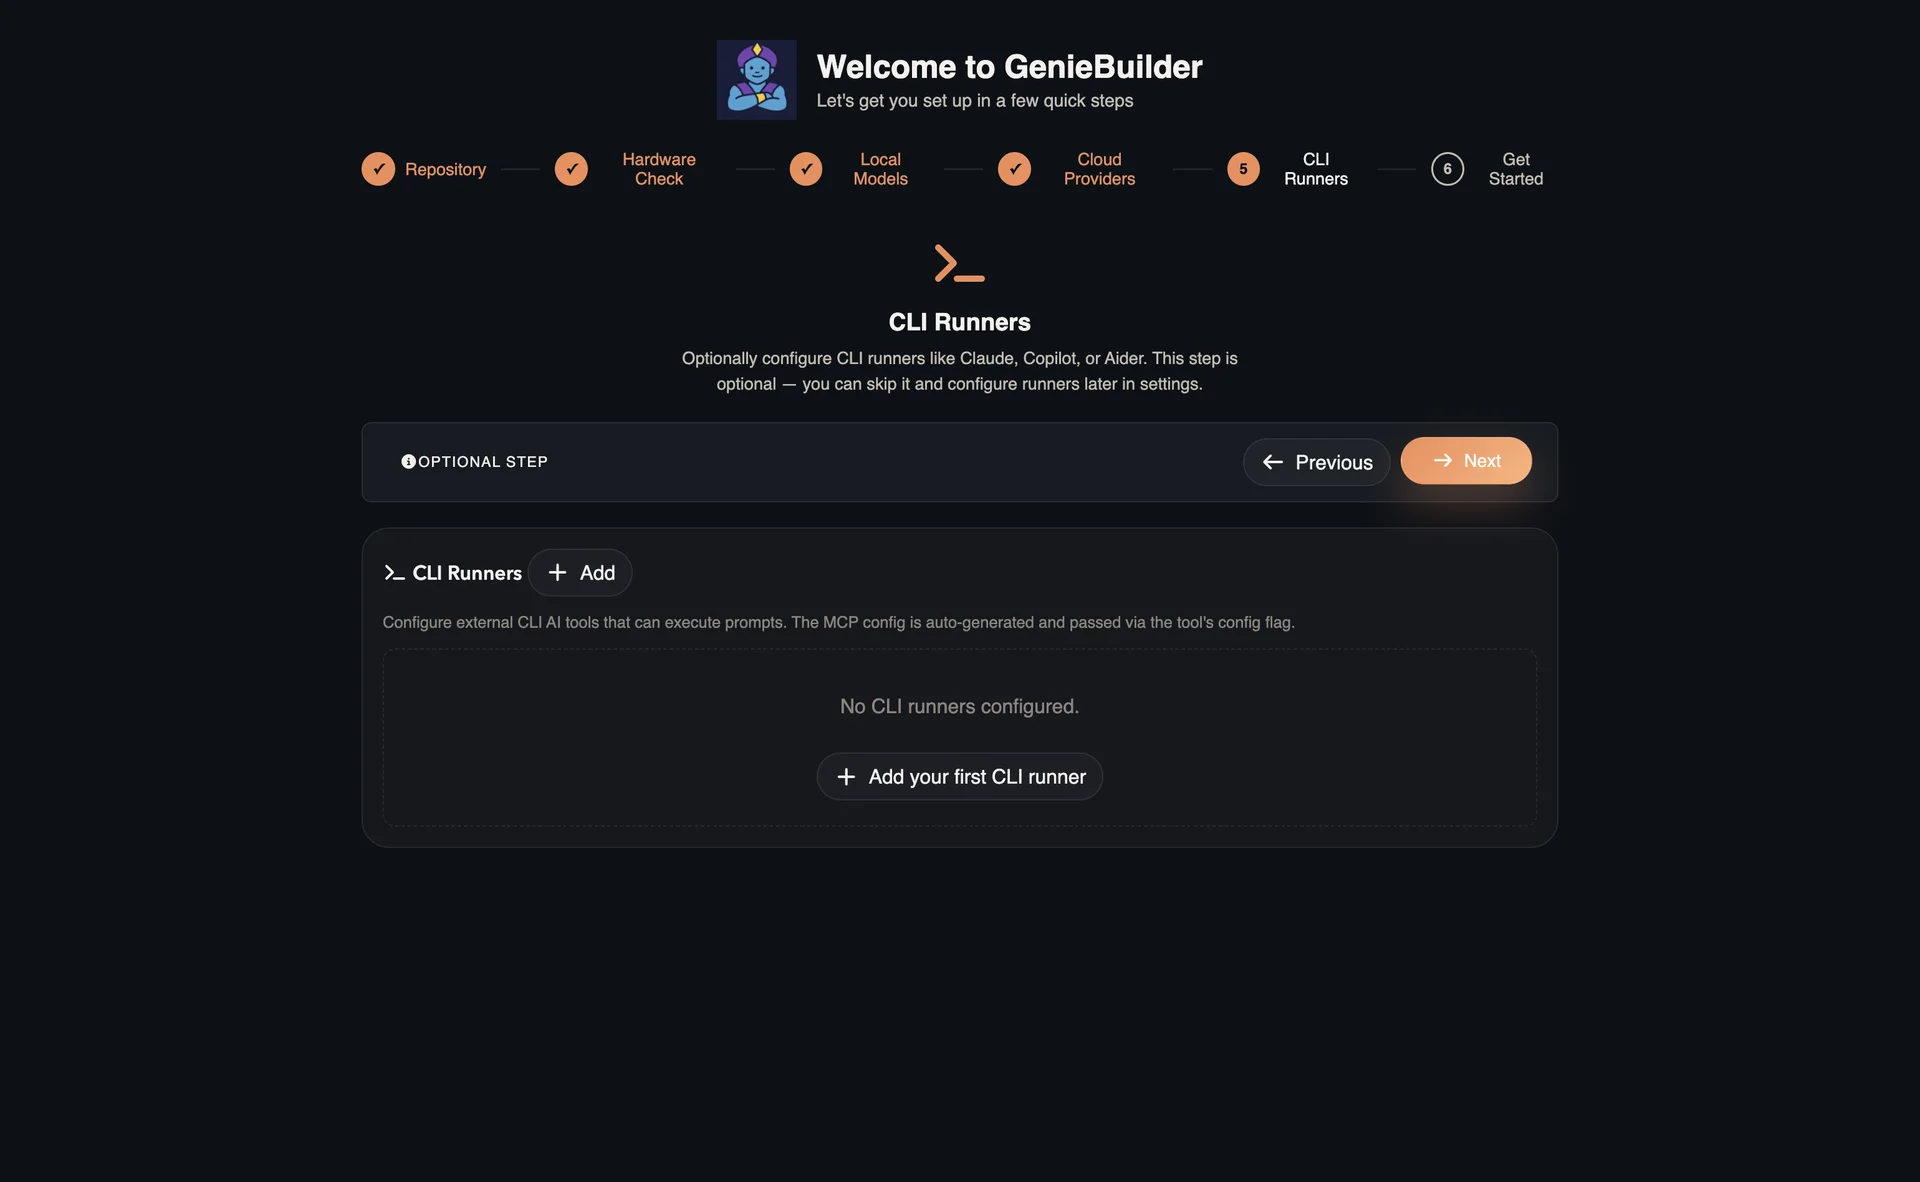
What are CLI Runners? CLI Runners let you integrate powerful command-line AI tools like:
- Claude Code - Anthropic's agentic coding assistant
- Kimi CLI - Fast, efficient code generation
- Codex - OpenAI's code review tool
Setup:
- CLI Runners are optional but recommended for advanced agentic workflows
- If you have them installed, GenieBuilder will detect them automatically
- You can add or configure them later in Settings
Step 6: Complete
Review your configuration and finish setup.
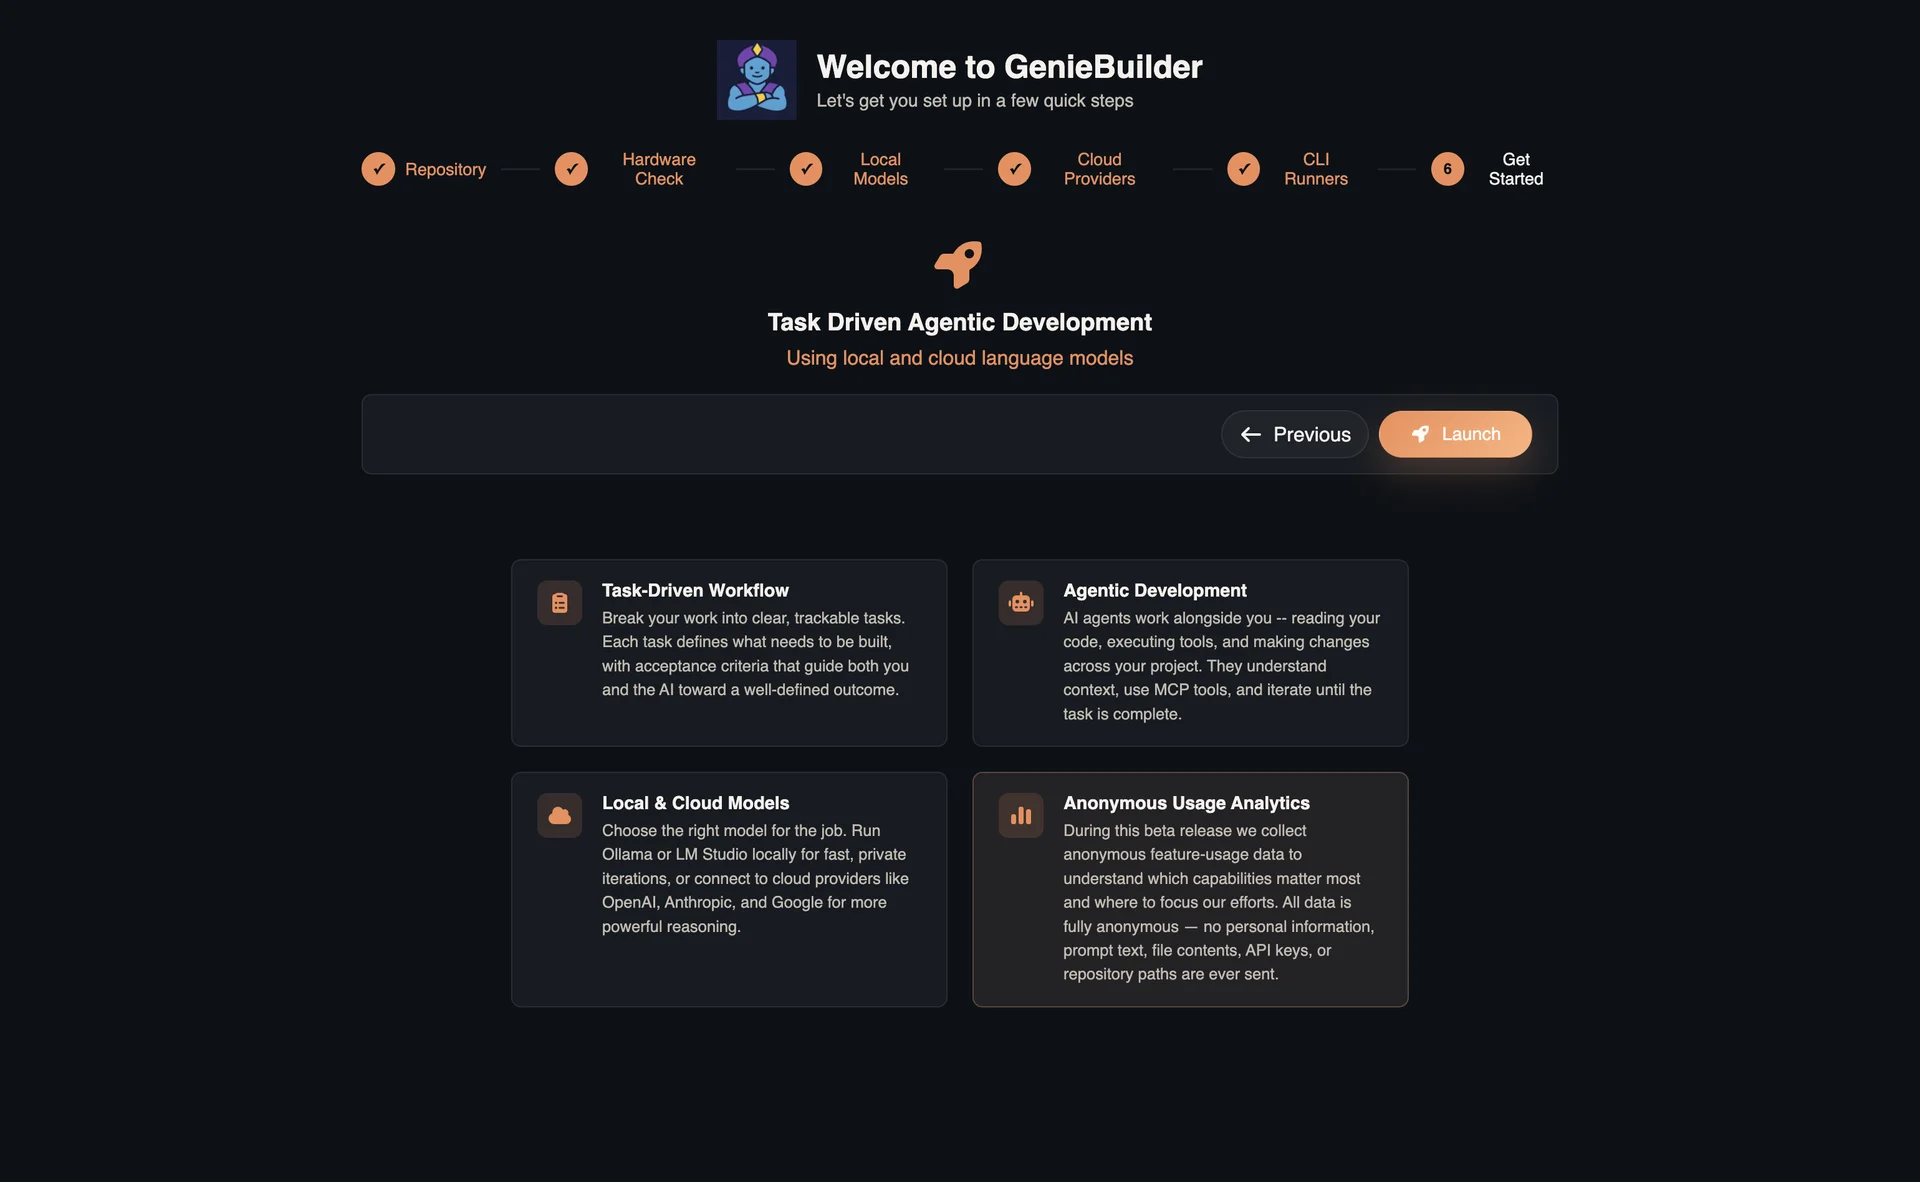
Summary shown:
- Project path (if selected)
- Configured cloud providers
- Configured local providers
- MCP integration status
Your action: Click Launch to enter the main application.
After Setup
Once you complete the wizard:
- Main workspace opens with your selected project (if any)
- Your settings are saved and will be remembered next time
- You can start using multi-tab AI chat, agentic workflows, and task management
Changing Settings Later
You can modify any configuration after onboarding:
- Click the Settings button (gear icon) in the header
- Add or remove AI providers
- Configure MCP integrations
- Adjust appearance and behavior preferences
Getting Help
If you encounter issues during setup:
- Check the Installation Guide for system requirements
- Visit the Quick Start for first steps after setup
- Review Troubleshooting below for common issues
Troubleshooting
Wizard Stuck on Loading
If the wizard hangs during setup:
- Check your internet connection (for cloud provider validation)
- If testing local providers, make sure Ollama is running
- Try restarting the application
Project Selection Fails
If selecting a project folder doesn't work:
- Make sure you have permission to access the folder
- Try selecting a different folder
- You can skip this step and set the project later
Provider Connection Issues
If connecting to AI providers fails:
- Double-check your API key is correct
- For local providers, verify the service is running (Ollama, etc.)
- You can skip and configure providers later in Settings
MCP Connection Issues
If tool integrations fail to connect:
- You can skip this step and configure MCP later
- Check the MCP settings in the Settings panel after setup
- Some MCP features are optional for basic usage