Quick Start
Get up and running with GenieBuilder in minutes.
1. Complete Onboarding
When you first launch GenieBuilder, the setup wizard will guide you through:
- Selecting a project workspace
- Configuring cloud AI providers (OpenAI, Anthropic, Gemini)
- Setting up local AI (Ollama) if desired
- Configuring MCP tools
You can skip any step and configure it later in Settings.
2. Create Your First Backlog Task
GenieBuilder uses Backlog.md for task management. Workflows run in the context of a task, so creating one is the first step before automating any work.
To create a task:
- Open the chat panel and ask: "Create a task: Add a greeting message to the homepage"
- The Backlog MCP tool will create the task and assign it an ID (e.g.,
TASK-1) - Your new task appears in the Task Board panel on the right
You can also create tasks directly from the Task Board by clicking + New Task.
Workflows use task details (title, description, acceptance criteria) as context for each step. A well-written task leads to better automated results.
3. Open a Workspace
Select a project folder using the file explorer. GenieBuilder will:
- Show a
.gitignore-aware file tree - Allow you to open files in the built-in editor
- Track tasks in the right panel (if Backlog is configured)
4. Configure an AI Provider
Choose from cloud or local providers:
Cloud Providers:
- OpenAI — GPT-5.4 and other GPT models
- Anthropic — Claude 4.6 Opus or Sonnet
- Google — Gemini 3.1 Pro and Flash
Local Providers:
- Ollama — Run models locally for privacy
- LM Studio — GUI-based local model management
- llama.cpp — Direct integration with custom builds
Add your API keys in Settings → Providers. Keys are stored securely using macOS Keychain.
5. Start a Chat
- Open the chat panel (bottom of screen)
- Click New Tab to start a conversation
- Select your provider and model
- Type your prompt and press ⌘+Enter to send
Each chat tab can use a different provider, letting you compare responses or use specialized models for different tasks.
6. Try a Workflow
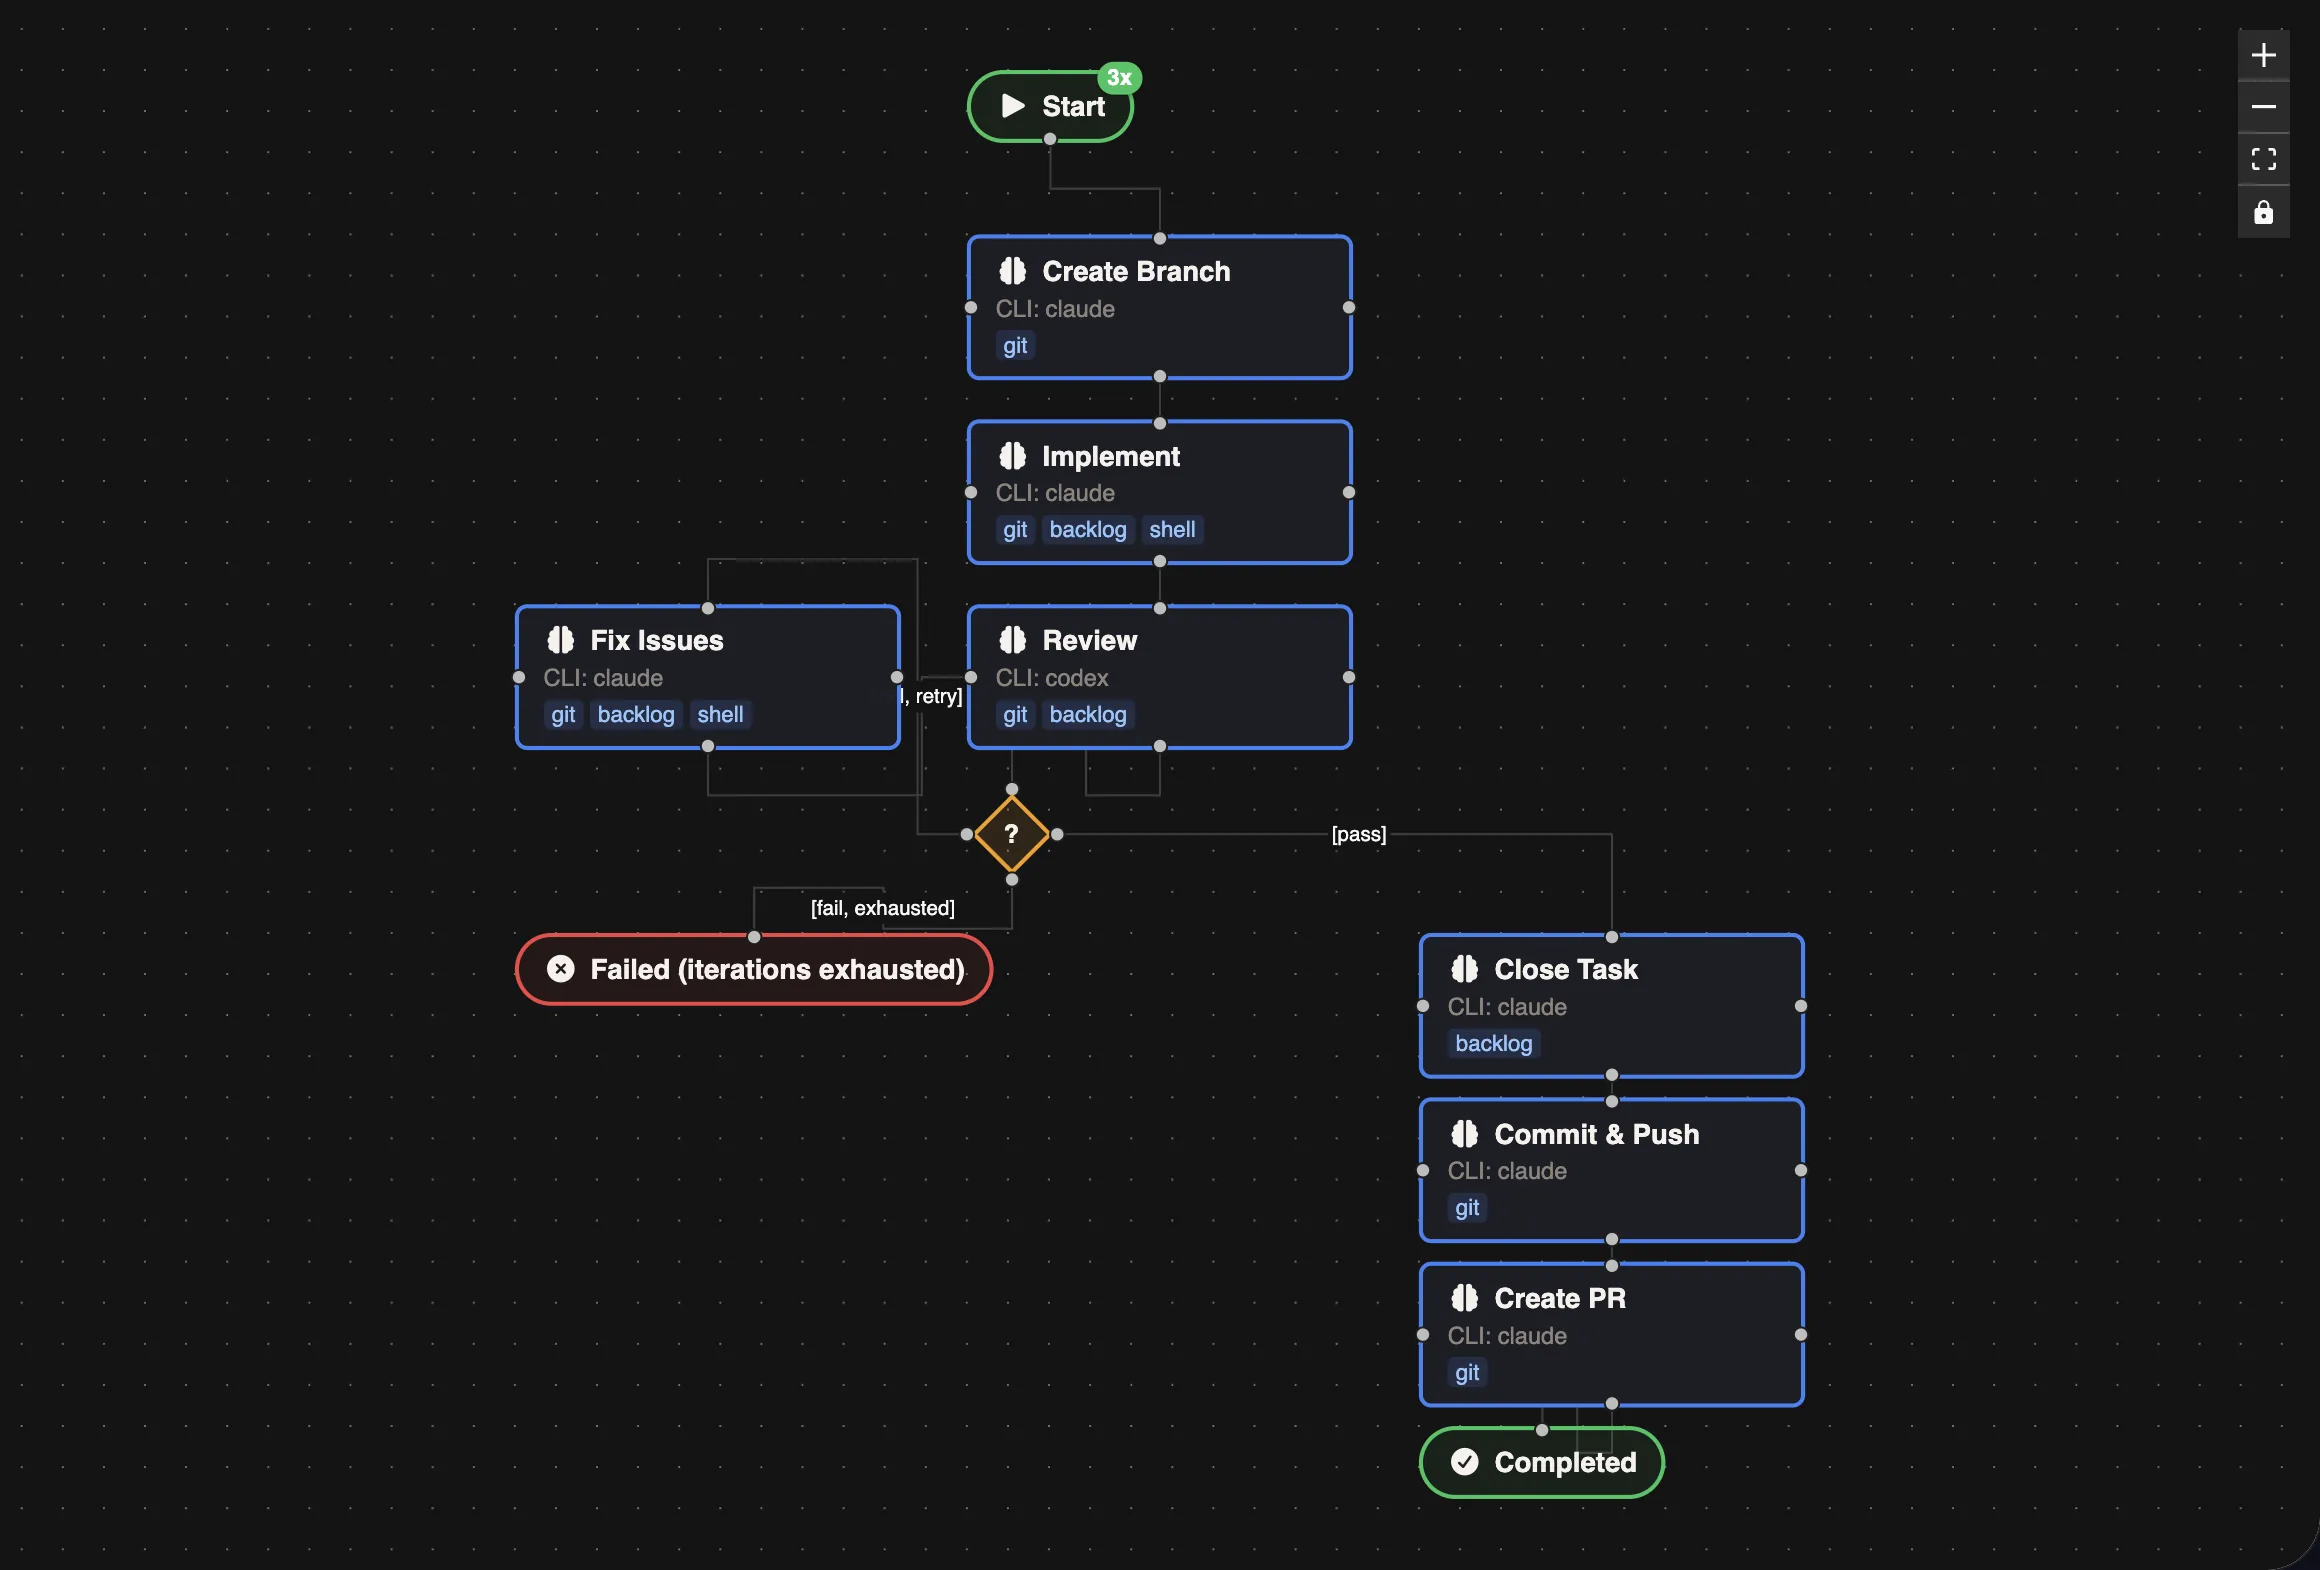
Workflows let you chain multiple AI agents into an automated pipeline. A great starting point is the "Implement, Review, Fix Issues" example — a multi-agent workflow that uses different CLI Runners for each stage:
| Step | CLI Runner | Role |
|---|---|---|
| Implement | Claude | Writes the code based on the task description |
| Review | Codex | Reviews the implementation for bugs and improvements |
| Fix Issues | Claude | Addresses any issues found during review |
| Git Operations | Kimi | Commits changes, pushes the branch, and opens a PR |
This pattern works well because each agent brings different strengths — Claude for deep implementation, Codex for thorough review, and Kimi for fast git operations.
To try it:
- Click the Workflow button in the header
- Select "Implement, Review, Fix Issues" from the examples sidebar
- Pick a task from the Task Board when prompted
- Click Run and watch the agents work through each stage
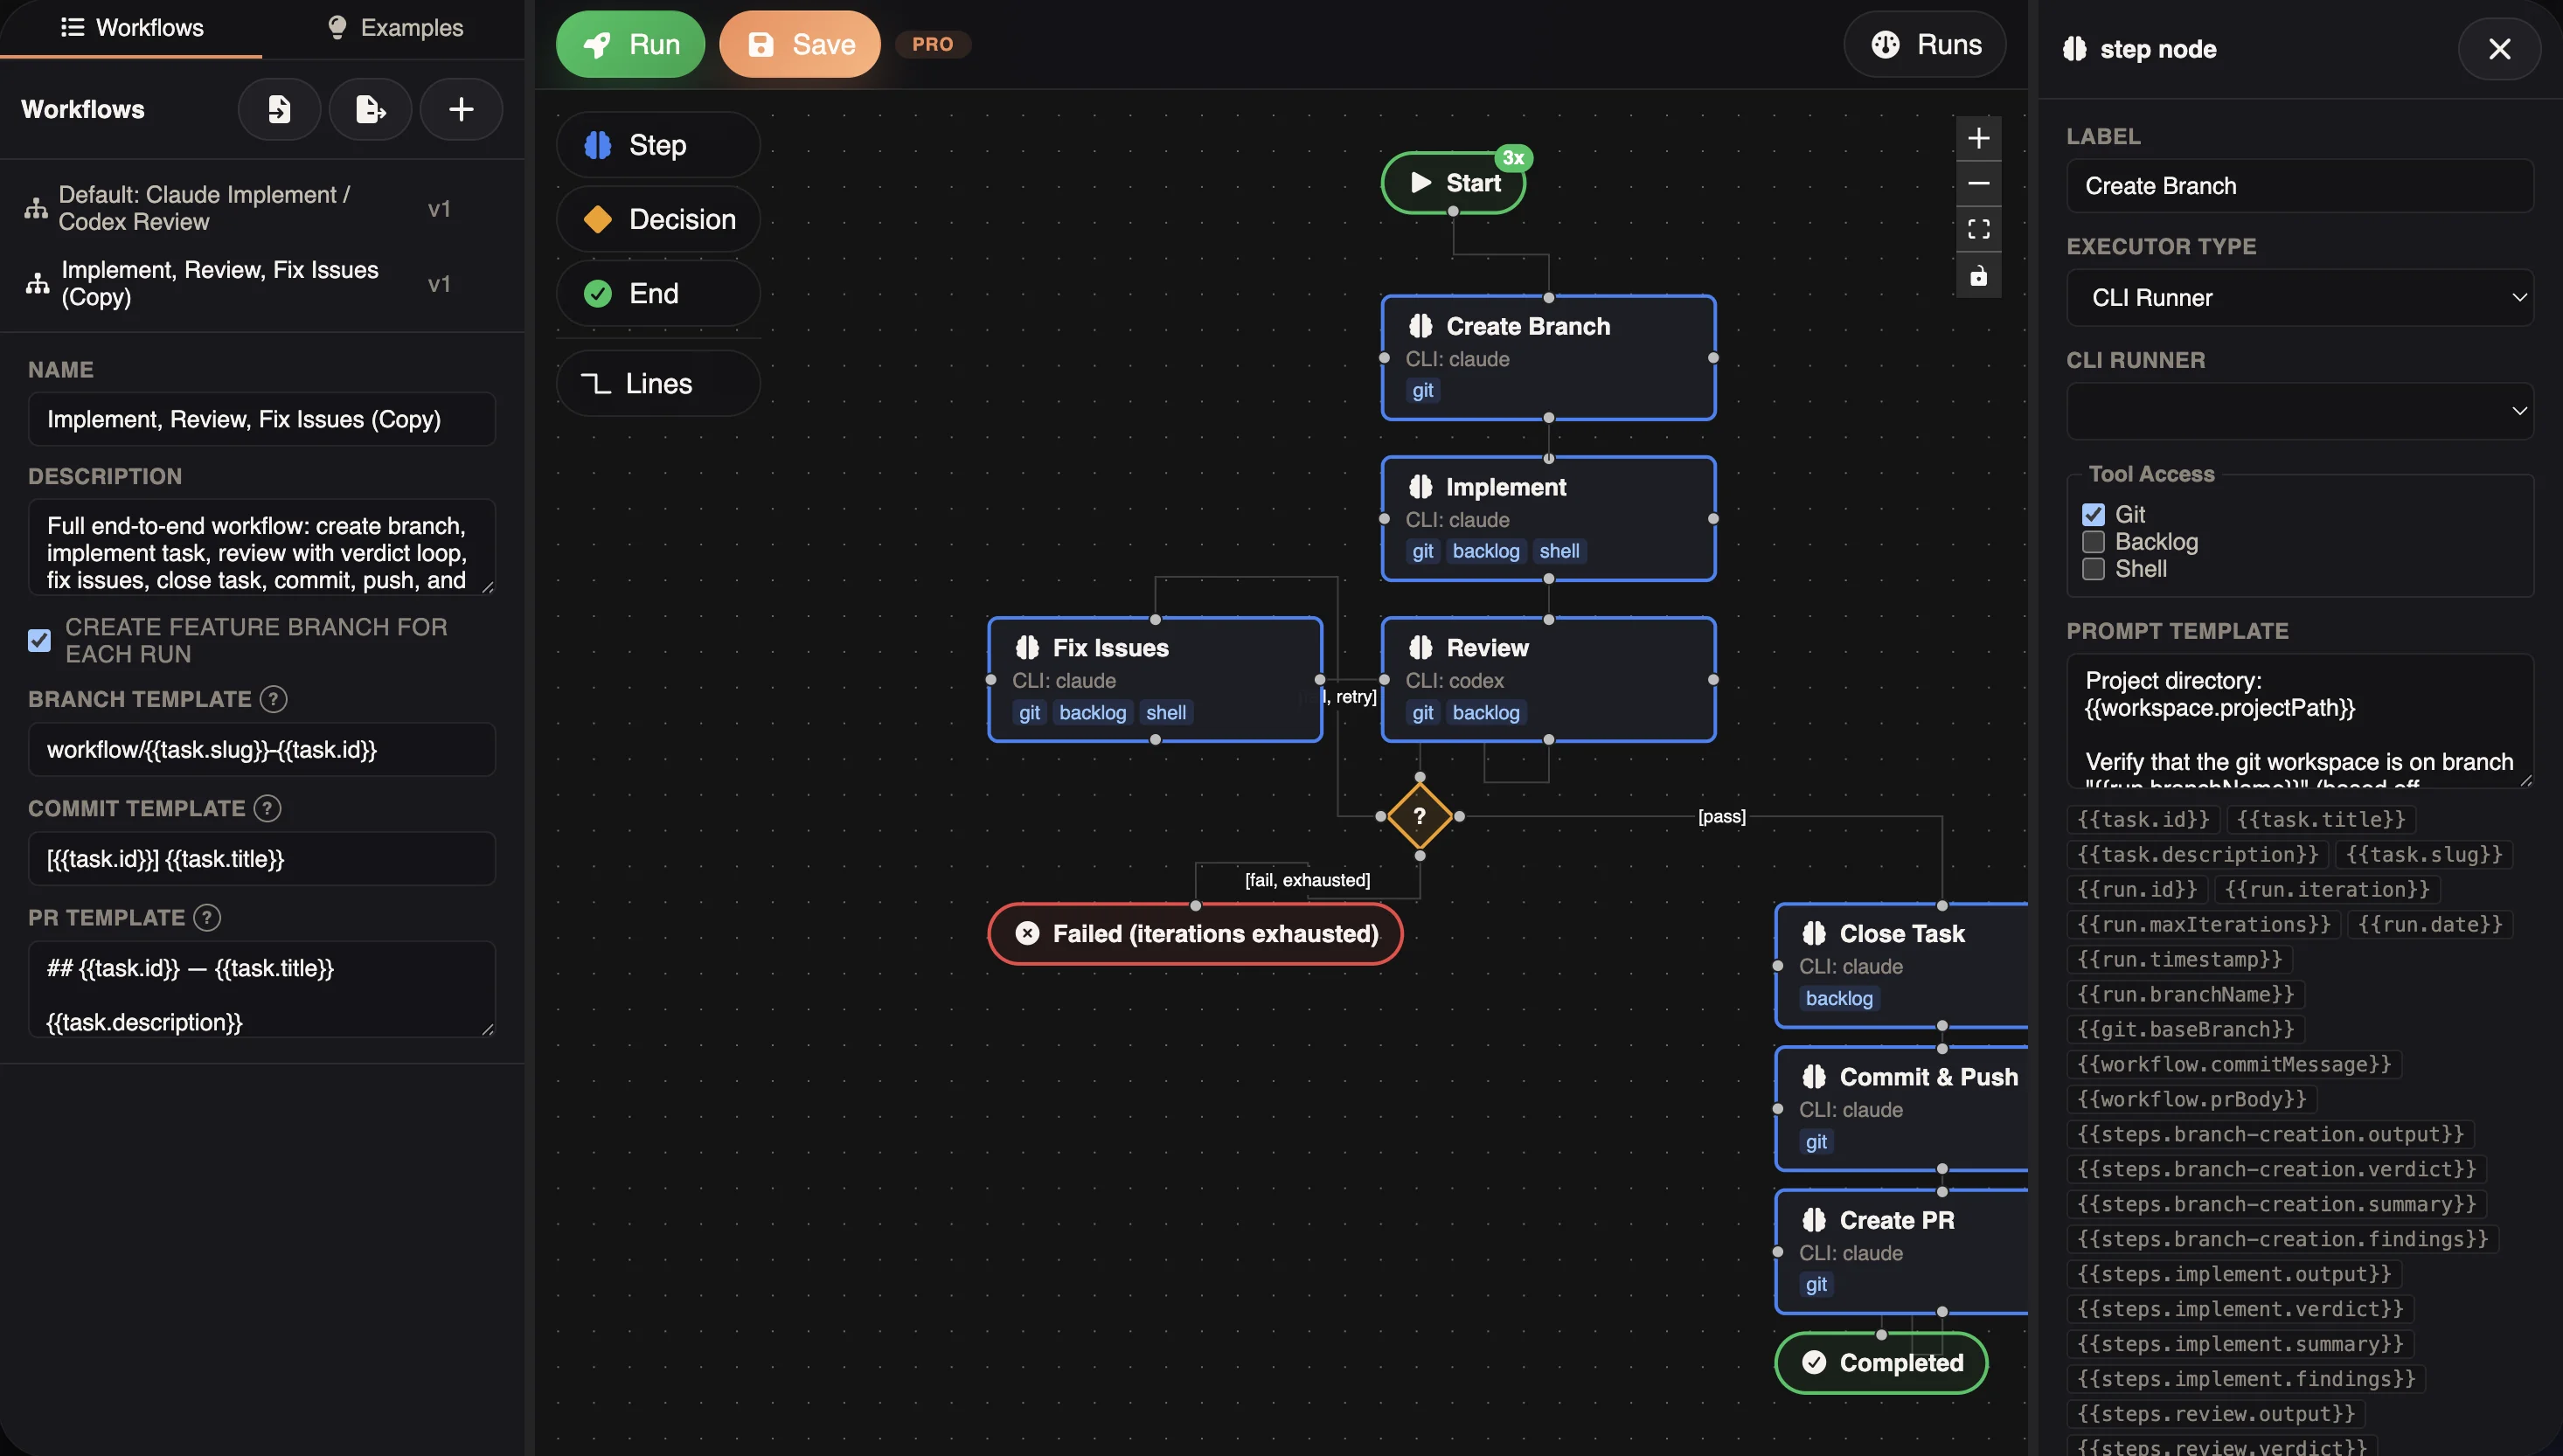
Click any node to configure its executor type, CLI Runner, tool access, and prompt template:
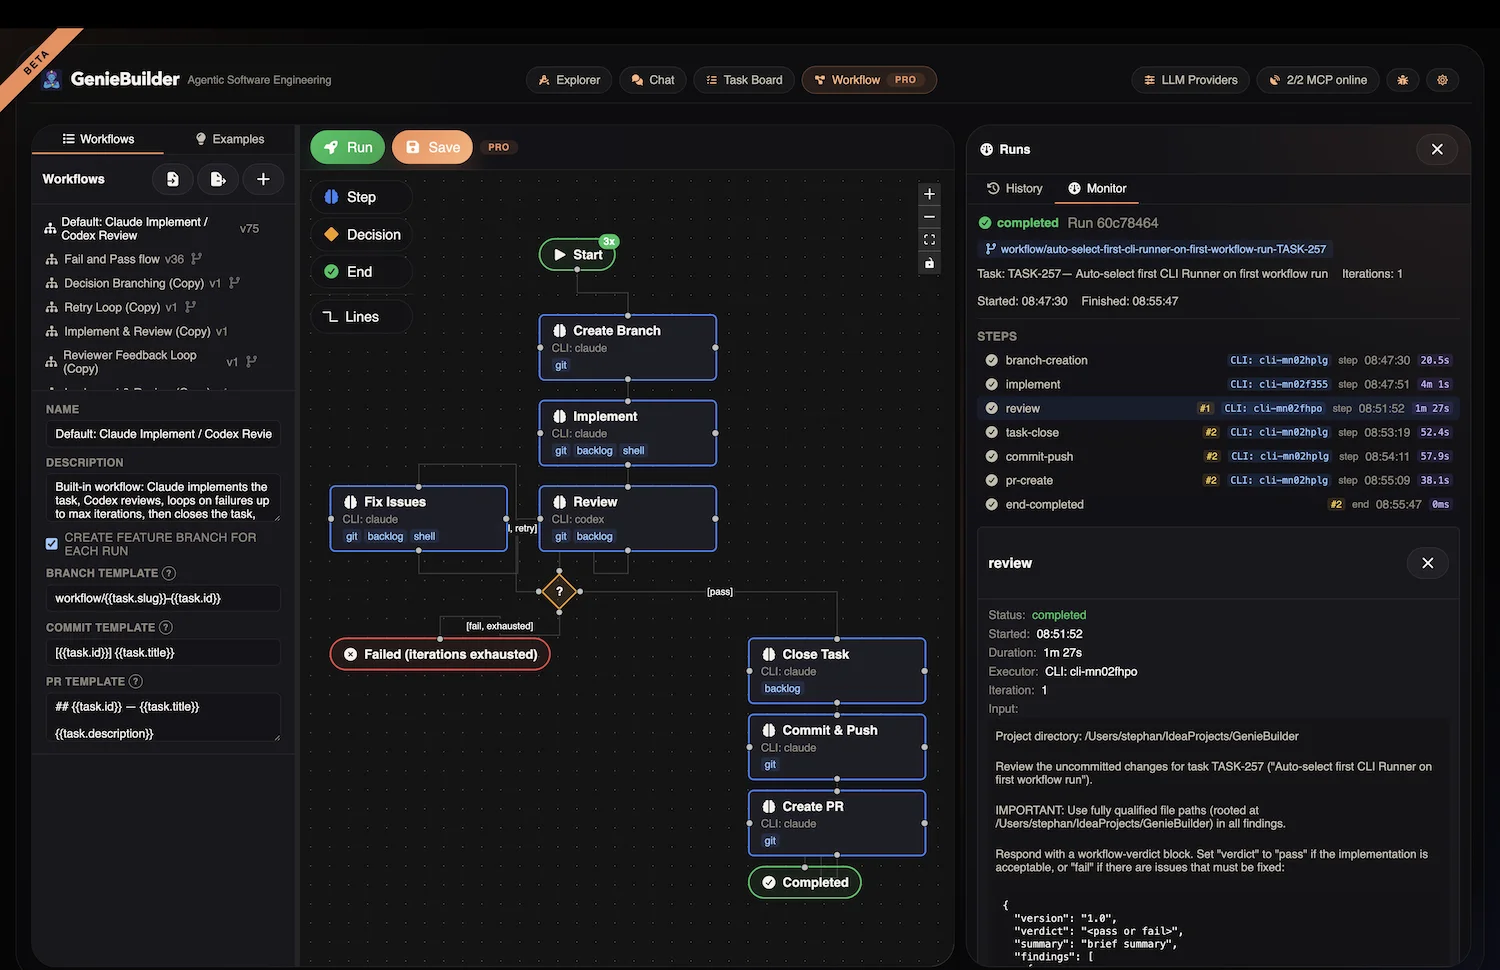
After a workflow completes, open the Runs panel to inspect the full execution history. Each run shows the status of every step, timing, the CLI Runner used, and the complete output — so you can see exactly what each agent did:
Next Steps
- Explore Workflow Examples for more automation patterns
- Configure CLI Runners to add more AI agents
- Learn about Task Management with Backlog integration